Outlook
Overview
The Outlook feature allows users to view Outlook emails directly within the application and take actions such as creating tickets from these emails. This integration streamlines workflow management by allowing users to monitor, review, and respond to emails without switching between applications, providing a unified approach to email-based support and task management.
The Outlook plugin brings incoming Outlook emails into the system, where users can review the email content and decide on follow-up actions. The integration is particularly helpful for support teams, enabling them to quickly convert relevant emails into tickets for efficient tracking and resolution.
With this feature, users can:
- View Emails: See a list of all received emails with details like subject, sender, date, and body.
- Create Tickets: Generate a ticket directly from an email to manage issues systematically.
To Access Outlook Emails:
- Go to the left sidebar.
- Expand the Plugins section.
- Select Outlook.
Viewing Outlook Emails
Upon accessing the Outlook, users are presented with a list of emails. This list includes essential details for each email, such as the subject, body, sender, sent date, and available actions.
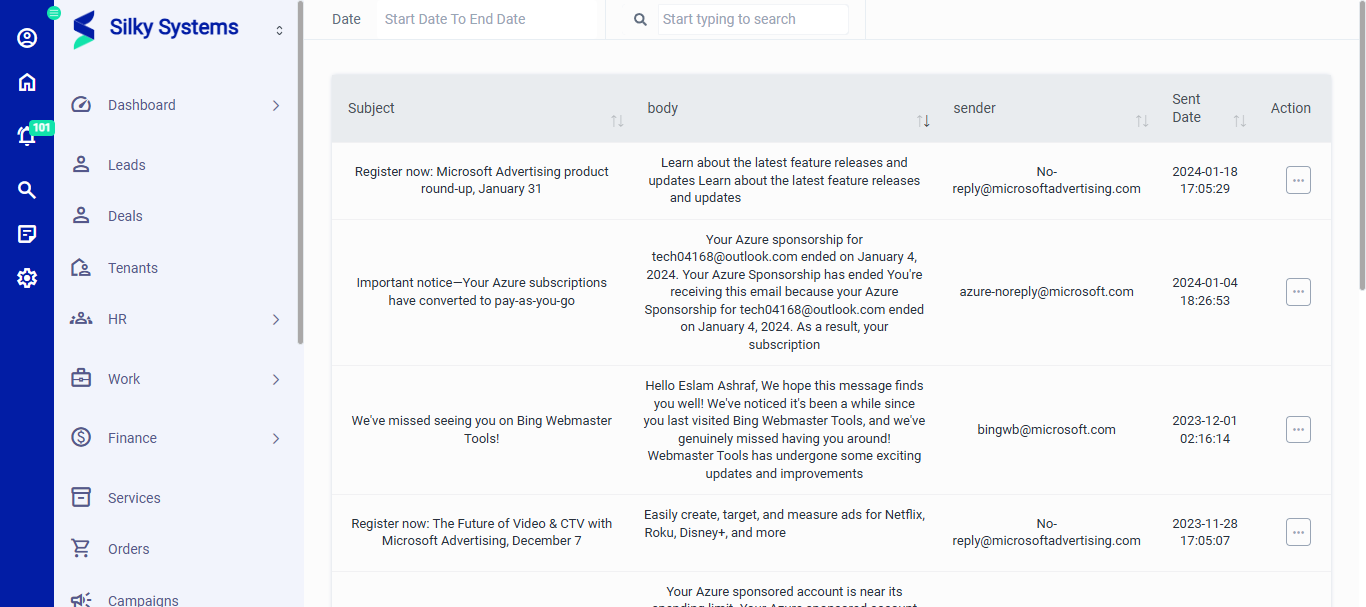 Figure.01 Outlook
Fields in the Email List
| Field | Description |
|---|---|
| Subject | The subject line of the email, summarizing the email’s content. |
| Body | A brief preview of the email content. |
| Sender | The email address of the sender. |
| Sent Date | The date and time when the email was received. |
| Action | Options to view the full email or create a ticket from the email content. |
Sorting and Filtering
- Users can sort emails by clicking on the column headers, such as Sent Date.
- A search bar is available to quickly locate specific emails by keywords in the subject or body.
Viewing an Individual Email
To view the full content of an email:
- In the email list, locate the desired email.
- Click the Action menu (three dots) on the right side of the email row.
- Select View to open the detailed view of the email.
Email Detail View
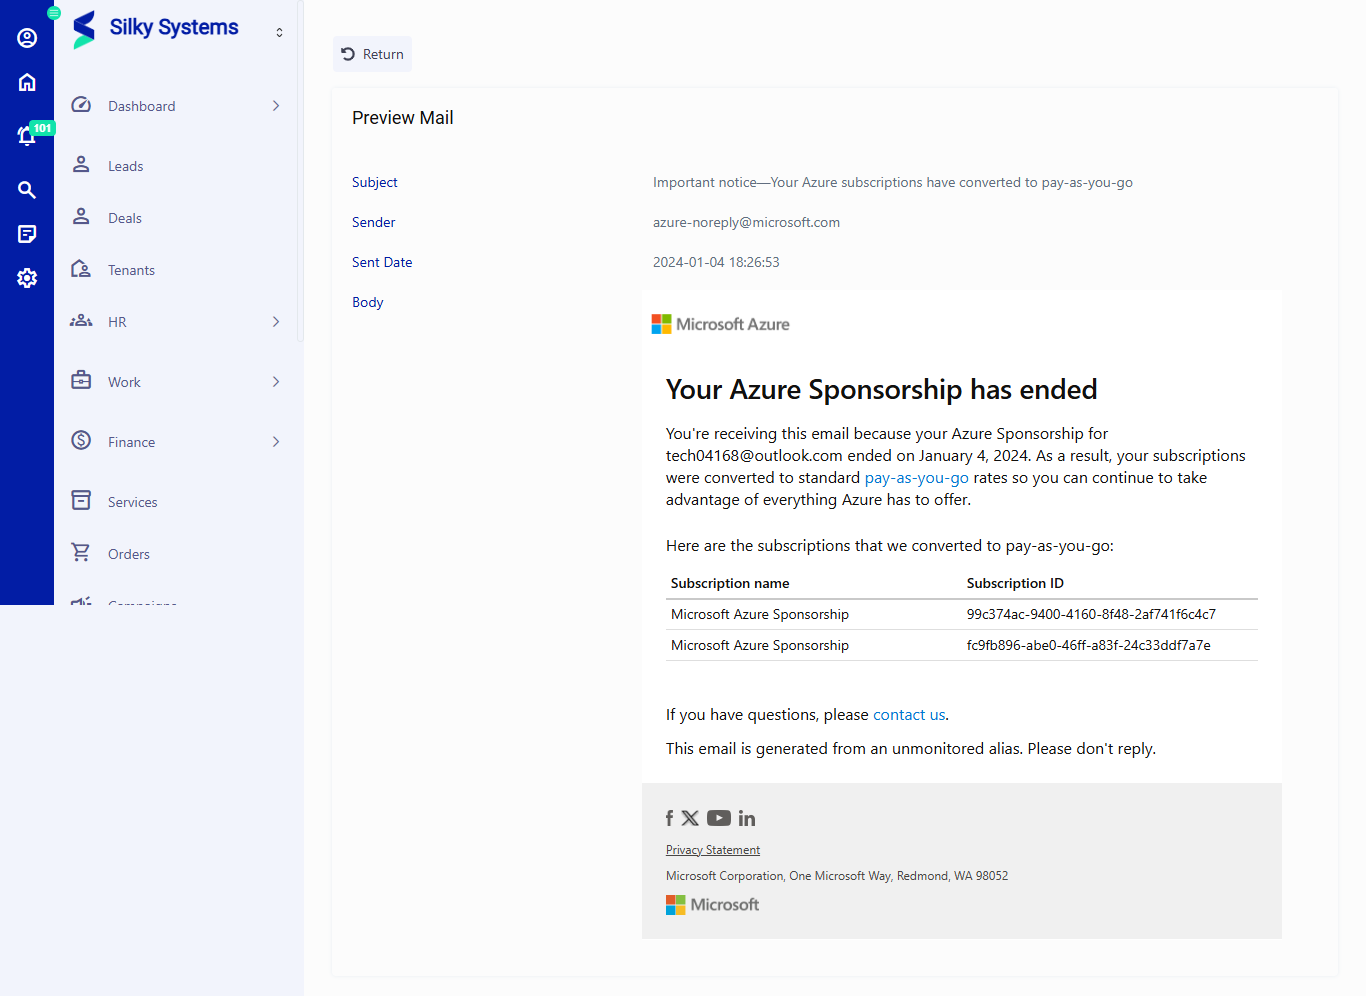 Figure.02 Outlook
The detailed view of the email displays:
- Subject: The full subject line.
- Sender: The email address of the sender.
- Sent Date: The exact date and time when the email was received.
- Body: The entire content of the email, including any formatting, links, or images.
The Preview Mail window allows users to read the email in its entirety, making it easier to decide on the next steps.
Creating a Ticket from an Email
The Outlook plugin allows users to convert an email into a ticket directly from the email list, which is especially useful for support or follow-up tasks.
Steps to Create a Ticket
- In the email list, locate the email you want to convert into a ticket.
- Click the Action menu (three dots) on the right side of the email row.
- Select Create Ticket.
- A ticket creation form will open with the email subject and content automatically populated. You can modify the information if needed.
- Click Save to create the ticket.
The email is now recorded as a ticket within the system, making it easier to track and manage as part of your support or task workflow.
By using the Outlook Integration, users can efficiently manage email-based communications and convert essential emails into actionable tasks. This feature ensures that critical issues are not missed and provides an organized approach to handling support inquiries or project-related emails.